
Open your image of hideously yellow teeth (like mine in the photo below).

Open a Hue & Saturation adjustment layer (from the half-black, half-white circle at the bottom of your layers palette. Going to image > adjustments > hue and saturation will not work. You'll see why...). In the drop-down box that says "Master," select "Yellows." Slide your lightness all the way to the right. Click OK.
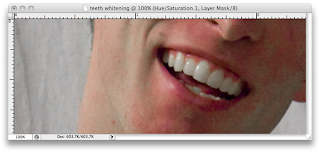

You can see that the skin looks splotchy where the yellows were both lightened and desaturated. The teeth are much improved, but overdone.
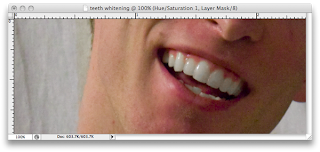
Invert the adjustment layer mask by clicking on it in the layers palette, and press cmmd/ctrl-i. This should hide the effect. With the mask still selected, paint the effect back in over the teeth with a medium-sized, soft, white brush.
Still too strong, so lower the opacity of the adjustment layer to about 50%, and voila.
It's an extremely fast, non-destructive, and effective method of whitening teeth in Photoshop.
~Tom

No comments:
Post a Comment